Friday, June 5, 2015

I hate you bear! I hate you bear! I hate you bear!

So with his new look, I decided to try to make a mold with the bear tonight. 

I took my time and started by sifting the sand that would contact the pattern.

I decided to make the parting line halfway down on the outside to make drawing it a bit easier. Of course, that meant I had to dig it out down to that level which took considerable time. In addition, it left the edge loose which I had to go back over with a small "sculpting" tool (a.k.a. shellfish fork from the dollar store).

When I went to separate the flasks, some bits from the cope ended up staying with the drag. I'm not entirely sure why this happened. Maybe not enough parting dust? Or possibly I didn't ram the cope enough?

Either way, I just added additional parting dust on top of that and considered it part of the drag.

I dug the runners though, as a slight deviation, I did them in the cope rather than the drag. I did this since my parting line was so low on the pattern but also because I had help starting it from the sand that decided it wanted to be part of the drag.

Then it was time to draw the pattern. Of course the Petrobond stayed inside. Dammit! Dammit! Dammit! Not enough parting dust? Rammed too hard? Who knows. I fucking hate this bear.

The exposed "core" shows the story. Not enough parting dust and, I'll admit it, the paint was still a bit sticky. Remember the 48 hours between coats in the instructions?

Because I'd spent so much time on it, I decided to try and get the sand out in a whole piece and reposition it back in the mold. I knew it wasn't going to be a usable casting but I decided to pour it anyway. My hope was that this would expose any additional gotchas that'd I'd run into.

So I fired up the furnace. Notice the GoPro stuck in the tree, I had it in time lapse mode. (Once I get around to it, I may piece together a quick video. No promises.)

Then I poured it which went okay except... I completely underestimated the amount of aluminum needed which resulted in a short poor. Looking back, I'm glad I went ahead with the pour. I would've been heroically pissed if the the mold came out perfect and I screwed it up at this point.


I hate you bear!

Thursday, June 4, 2015

Bear pattern rework number....

... I've lost count by now. 

Even though the sides were smoothish and had some draft to it from my last rework, I think part of my problem is the lack of fillets. In the bit of studying I've been doing about casting, several books mention them but it was actually a short paper by Ian M. Kay from the Cast Metals Institute in Des Plaines, IL. (Who knew there was such a thing? The CMI... not Des Plains, IL. I'll have to check them out. Again, not Illinois.)

The paper is called "Patternmaking 'Tricks' [sic] for Better Castings". Although the paper is relatively short (2 pages) it contains one of the better explainations about fillets, radii, and their importance than almost all the other books I've read through.

I won't rehash here what he wrote but I encourage you to read through his paper if you have a second. There's some good info there.

So back to the bear. I'm not a fan of the wood putty I used the last time I "fixed" the pattern. It was far too gritty and difficult to spread on Masonite. Instead, I thought I'd give Bondo a try. Plus, there's nothing like huffing some MEK peroxide and styrene.

It's been a while since I worked with Bondo. As you may note in the first pic, I mixed up quite a bit the first time. The instructions say something to the effect of "only mix what you can use in a couple of minutes". Boy, they weren't kidding! I barely used any of that first batch before it got difficult to spread. On later mixes, I made much more conservative batches.

It went pretty well though it was difficult to smooth in the tight spots. I figured I'd just take care of that when I was sanding. 

Yeah, difficult location to smooth means damn near impossible location to sand. I did the best I could. 

I think I sanded for probably two or more hours just trying to get all sides as close to perfect as possible. I spent this time because I swear this is the last major rework of this pattern before I scrap it and start over. (Famous last words....)

Once it was smoothed to my satisfaction, I hit it with several good coats of the Rust-Oleum 2x Paint + Primer. As I've mentioned before, I really like this stuff because it lays down a good, thick coat and I don't have to use clear/urethane afterwards.

Also note the board of screws I quickly made to support the bear. This wasn't done as a form of torture for the bear, though some is probably due for the grief he's caused me. It was to support it while making as little contact as possible. This was to avoid having to wait for it to completely dry before flipping it over to do the back side. The re-coat times, according to the label on the can, were within one hour or wait 48 hours. As I'm hoping to try to make a mold in the next day or so, I don't have that kind of patience. 

Here is his new look.

By the way, happy birthday Dad. RIP.

Wednesday, June 3, 2015

Fixing the Jar patterns

During my casting sessions last week, I had a bit of trouble drawing the OF jar patterns from the Petrobond. If you recall, these are the epoxy copies made from may laser cut masonite originals that survived my plaster mold failure learning experience.

The originals were made at the same time I made the OF MF patterns on the laser cutter. I.e. these were made back before I knew about the importance of draft lines, fillets, etc. in patterns. 

You may also recall that, prior to making the latex molds for these and the MF patterns, I used epoxy to "fix" the hard vertical edges but only in the MF patterns. I didn't do this to the jar patterns because: A) I didn't know how well it would work and B) those were the harder patterns to make and didn't want to risk ruining them if "A" went out poorly. I figured if it turned out to work on the MF patterns, I'd do it to the jar copies at a later date.

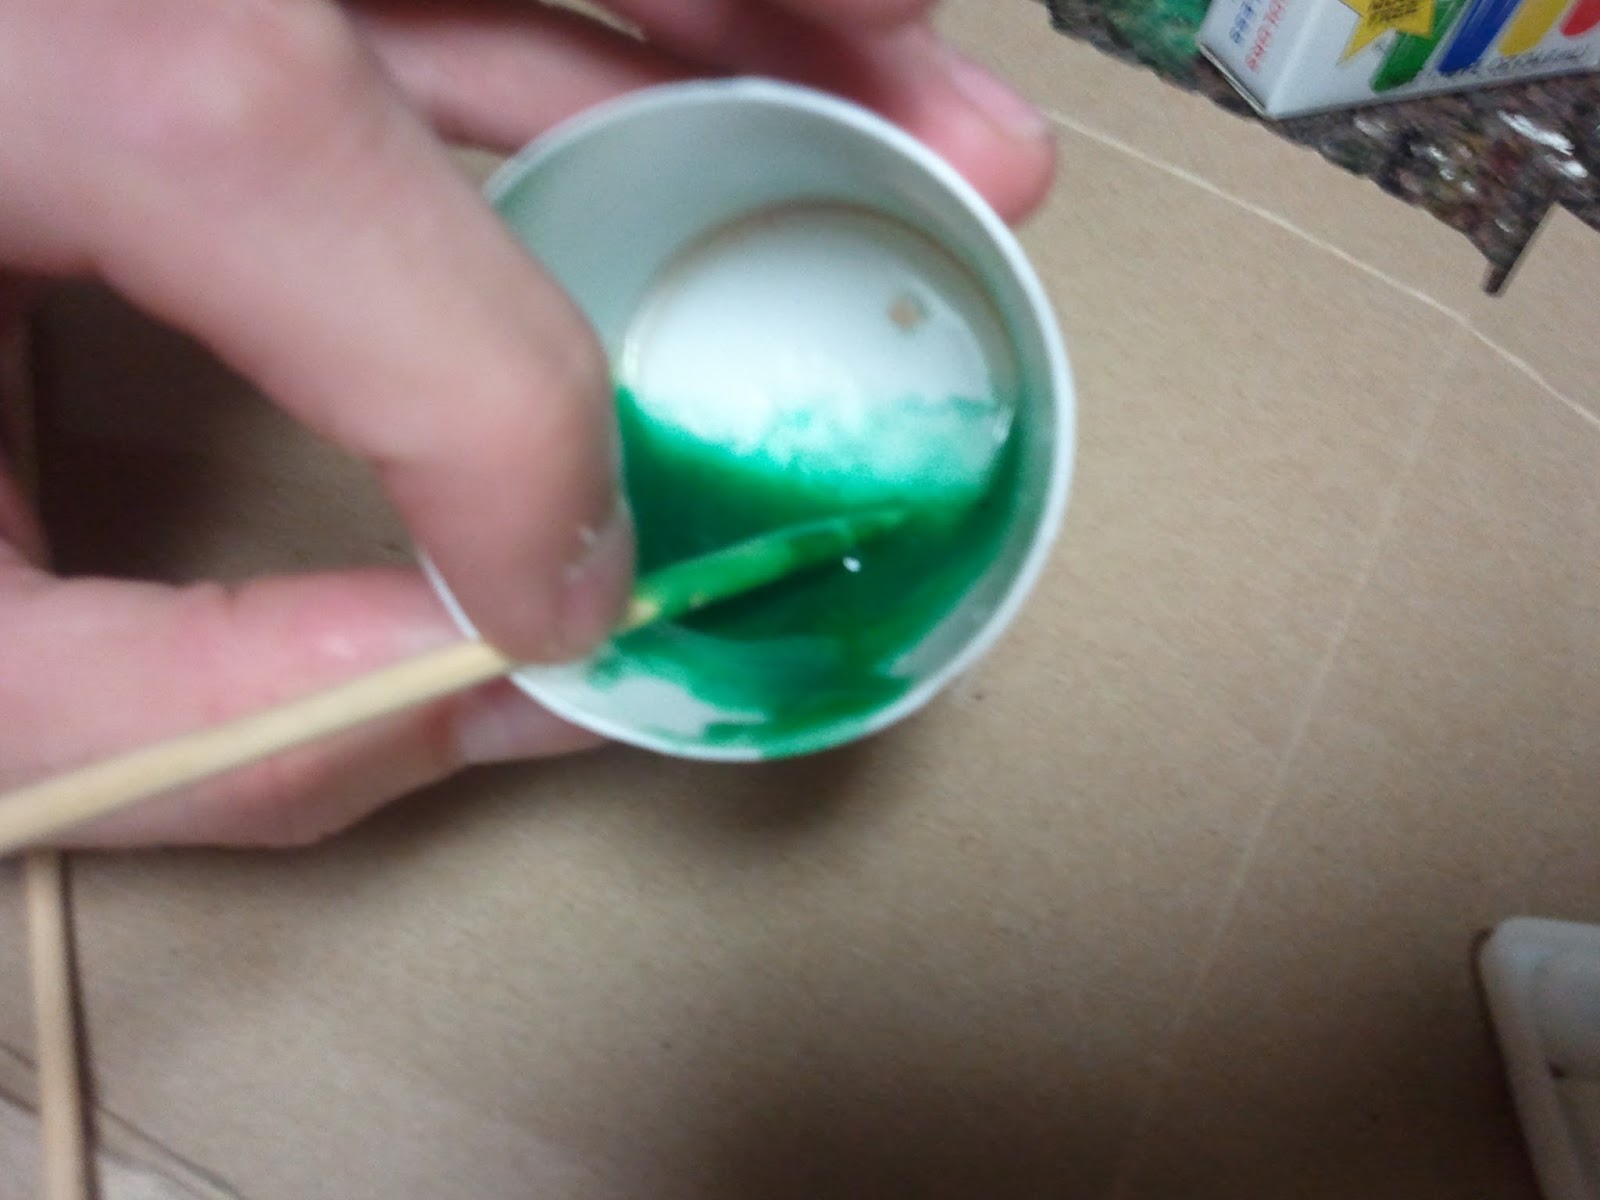
Well, that time is now. Since the copies are white, I thought it'd be easier to use a little color so that I can see how much epoxy I've added to the pattern so that I don't over do it. Even with the darker MF patterns, the clear was hard to see and I ended up doing a little too much in several areas on one of them.

Turns out, you can use food coloring in 2-part epoxy. I searched the interwebs before I tried because I wasn't certain how it would affect the chemical reaction between the liquids. Naturally, I found answers all over the spectrum, NPiTD. Lacking a definitive answer, I decided to go old school and actually try it. While I wouldn't do this if it were relying on the bonding properties of the epoxy, nor if these were finished products (as there are more appropriate color additives), it seemed to work fine. This was two drops worth.

Now I didn't pick the colors to be cute (except for the jar and moon portions, I was just having fun there). These were quite a bit harder to fill in due to the large amount of recessed area but they turned out okay. 

I'll sand down the tops slightly to get rid of the drops where I ran over. And then it's a matter of trying them out in a mold.

Saturday, May 30, 2015

Pouring again, this time with a little more difficulty.

Following my mostly successful attempt the other night, I decided to up the ante and cast some larger, more detailed, and odd shaped pieces.

To start with, we have the bear "bezel" that started me down this whole casting rabbit hole. Then I chose a bottle opener I found at the craft store for 99 cents since it'd require an interesting parting line. And finally, I decided to through in a couple of the Old Filthy Jar logo patterns I made up a while back. These in particular I expected trouble with because I made them with way too much detail for their size. At best, I think these will only work for lost wax casting but, since I had luck last time, I'll press it.

The four samples fit nicely in my small flask. There probably is a better way to lay them out (as far as order for pouring due to volume and surface area. But I have no idea what they may be so we'll consider this an experiment.

Now, with the drag rammed and parting lines exhumed. Check the parting line on the bottle opener. I thought that was interesting (and why I chose to use it). I did cheat a bit though because you can see the line on the original casting. The bear didn't appear to need a altered parting line, the division between cope and drag seemed most appropriate.

Starting to fill the cope. You can see the char marks from where the extended riser blew out the other night. Hopefully I won't be repeating that.

With both sides rammed, I separated them and removed the patterns. You can see already I had problems with the OF patterns. It pulled up complete sections between letters. They will definitely need some rework to add fillets and drag or be relegated to lost wax casting only. I also haphazardly carved in the runners. I could already tell I might have some issue with the bottle opener placement. Looking back, it might have been better to swap the vent and riser positions so that it got fed first.

Then I fired up the furnace and added equal parts Lone Star muffins (a.k.a crap aluminum) and VV quality muffins.

Once it was up to pouring temperature... a quick swig for good luck. (It worked last time!)

And again, it blew out between the extended riser and the top of the cope sand. At this time, I'd like to point out that there is no aluminum splashed on the top of the extended riser yet you can see the aluminum mushroom coming from the vent hole. This means I am being pretty damn accurate pouring and hitting the hole and I'm not just pouring aluminum all over the place. Either way, the wood and cardboard made a nice cloud of smoke for quite a while. No visit from the fire department this time either.

Once it all cooled down, I busted it open to see how I faired this time. The bear came out great! There were a few defects, but after some clean up, I think it'll be usable. The OF key chains are a wash but we knew that already. The bottle opener, however, was completely MIA. I'm not entirely certain what happened. I had more than enough as evidenced by the blowout up top. Maybe the run was just too long and, after filling both key chains, things had cooled down enough to where the aluminum flow stopped? I don't know. I'll just have to try it a different way next time.

Friday, May 29, 2015

My first aluminum pour! [Again!]

After revamping my flasks and (especially) the Petrobond arriving I've been anxious to ram up some molds (I think that's what the cool kids are calling it) and pour some aluminum.

I decided to not get too carried away and just went with something simple: the epoxy patterns of the Old Filthy keychains. 


Got them rammed down in the drag and the parting line dug down to about half the thickness of the pattern. Two of them managed to shift while ramming. Hopefully it won't be a problem but I'll need to be more mindful of this in the future.
I assembled the flasks and packed the cope portion complete with a riser and vent tube. I didn't pack it all the way to the top because I didn't want to use all of my Petrobond in one pour. It still had a good 1 1/2 inches on top of it.
Then I separated the flasks to reveal a somewhat reasonable parting line.
The sprues were cut to the riser and vent in a somewhat haphazard manner. I don't think these are super critical as long as they are a reasonable diameter and don't zigzag all over the place. By varying them slightly, it will give me something to compare and contrast after the pour to see if I am correct in my assumption.

I also made an extended riser to keep additional pressure on the molten metal (via gravity) as it cools and contracts. I know this wasn't my only problem when I tried the lost wax/plaster molds but I think it was a contributing factor.
Speaking of the plaster molds, it was time bring the furnace up to temperature and preheat the alumumin pieces before melting them down. I decided the first things to get melted down would be the failed pieces from the plaster mold attempt which I guess was technically my first pour making the title to this post somewhat inaccurate. The little blob at 3 O'clock was from an overpour while making muffins.

Since the failed pieces were made of mostly Lone Star cans, and I didn't want to come up short on aluminum, I decided to add a muffin from the scrap I melted a couple of weeks ago. And then it was a matter of waiting for everything to be ready to pour.
The aluminum in the furnace was ready. (That's 1355 degrees Farenheit!)
The mold was ready for the aluminum.
And the author was almost ready to pour. (One more swig for good luck.)

The pouring part was mostly uneventful though I did get carried away and some aluminum blew out below the extended riser and the top of the sand. (Relax. Shortly after taking this pic, I moved the riser and blew out the flames.) Between the cardboard tube and the wooden flask it seemed to smolder and smoke so bad I thought for sure the neighbors were going to call the fire department.

And then... more waiting. Thirty minutes later, the center of the mold was still 325 degrees F.
Finally, it was cool enough to bust open and reveal my creation! I was careful to keep the chared Petrobond seperate and scraped it into a seperate container. I'll need to figure out how to reclaim that, if possible.

And here's the casting. It definitely isn't perfect but it came out much better than I expected. There is some cleanup that needs to be done at the parting lines and in some of the features and I'll post more pics after I do that. But, for now I am VERY glad to have something come out that I didn't immediately feel like remelting.

Wednesday, May 27, 2015

What the hell is a 'plinth'?

Somehow during my research on building the furnace, most likely due to my impatience to light some stuff on fire, I completely missed the section on plinths.

Basically, as I've now learned, a plinth is a piece commonly made of refractory material and is set in the bottom of the furnace for the crucible to rest on. Typically they are cylindrical (shaped like a hockey puck) and slightly smaller than the base of the crucible. 

The plinth has two main functions as best I can tell: it elevates the crucible out of the direct flame and it exposes some of the bottom so that it is heated as well.

Gee... that first item sure sounds like root cause of why I'm blowing through the side of stainless steel containers!

I have enough left over material to mix up and make plinths, however I don't want to wait the week plus for them to dry properly (though I should get some going in the background). I lieu of that, I figured I'd scavenge the bits I made from the leftover refractory while originally pouring the furnace. 

If you will recall, I poured most of the leftovers into a coffee can with the intent of making a smaller furnace that I could use for quick jobs. I used a mostly empty propane bottle for the inner portion of the mold which I wrapped in masking tape. My thought process was that the moisture in the refractory would degrade the adhesive on the tape so, once it was dry, the propane bottle would slide right out.

No surprise that didn't work and I ended up with a propane bottle cemented into a coffee can. It did make for a handy torch stand while I used the remaining propane though.

VERY carefully using an angle grinder with a cutoff disk, I cut the coffee can into sections, making sure to only cut through the can and not into the refractory or worse (BOOM!) the propane bottle. I then finished the cuts by hand with a hacksaw blade to make sure I stopped well before damaging the bottle.

Even with cutting them into sections, they still wouldn't slide off the bottle so I had no choice but to break them into several pieces. 

These aren't the ideal puck shape and they are a bit large for my furnace. I'm hoping I can chip them into a proper size and shape to use until I can make more appropriate plinths.

I am a little bummed I won't be able to make a small furnace like I originally planned, more importantly, I didn't blow myself up recovering the propane bottle.


Tuesday, May 26, 2015

Finally switching to Petrobond.

After so many failures making molds with my homemade greensand, I finally threw in the towel and ordered a box of Petrobond. More specifically, Petrobond II from Charles Thompson at www.petrobondforsale.com.

His prices were reasonable and include shipping. It arrived within a few days in USPS flat rate shipping box. 

It's good to see the Postal Service takes the same care and concern with all packages, even if this is just 20 pounds of sand. At least it wasn't busted open.

Upon opening the box, I can immediately see why I was having so much trouble with my previous mold attempts. So this is what molding sand is supposed to look like!?!

This stuff is so much finer than I was able to get my homemade concoction. It sticks together wonderfully and looks like it'll be much easier to work with. I can't wait to get some molds together and finally get around to pouring!


Friday, May 22, 2015

Cope and Drag Version 1.2

My plans for the evening were to ram up some sand and test the modifications I made to my flasks yesterday. We've been experiencing some record rainfall the past week or so and, unfortunately, the area of my backyard where I set up my furnace is standing in about two inches of water.

Oh well, I've been complaining that this set of flasks was just a bit to small. So, I grabbed some scrap plywood and headed up to TechShop.

A few minutes on the table saw and chop saw and the pieces were cut to size.

Then (slightly more than a few minutes later) I had another cope and drag. This time, slightly larger.


Thursday, May 21, 2015

Cope and Drag Version 1.1

I'm still having all kinds of trouble with my greensand mix and getting effective molds. (Spoiler alert: I finally broke down and ordered some Petrobond. More on that later....) But, in the meantime, I have rammed the flasks I built a while back enough to realize there are a couple of things about them that annoy the crap out of me about them.

To start with, here is how they looked up until tonight.

The 3/8" strip around the center seemed like a good idea initially to help hold the sand in place. In practice though, it really gets in the way when you're trying to ram the sand. I don't think it's necessary and, in the future versions, I'll probably route out grooves as opposed to using a projecting piece of stock. So the first step was to bust those out.

I've also realized these flasks are a bit smaller than I intended. There isn't anything I can do about that directly but I can convert them into snap flasks. This configuration might even turn out to be even more useful for the projects I have planned. 

In order to do this though, I had to remove the screws but also bust them apart. As I mentioned in the original post, I overbuilt them just a tad which included gluing all mating surfaces in addition to the mechanical fasteners.

A few aggressive minutes with a hammer, nail bar, and a 7-in-1 tool and they were apart without too much damage.

Then it was just a matter of installing the hardware. Now before you say it, I wasn't trying to be fancy by using brass. Surprisingly, they were the same price as the galvanized steel ones.


Several minutes later and v1.1 is done.